How to Pack a Backpack for Backpacking Trips
Before you head out on a backpacking trip, one of the most important steps is learning how to pack a backpack. Although there isn’t one right way to pack a backpack, we’ve provided you with some recommendations based on expert advice.
Your packing strategy will differ depending on the size of your pack and the type of camping you’ll partake in. For example, fall/winter/early spring camping is going to require more gear since it’s colder.
The following recommendations are for a three-day (weekend) backpacking camping trip using a quality pack designed for backpacking. Also, it’s important to note that not all packs feature the same components, pockets, or features.
Backpack Weight Distribution Tips
Learning how to pack a hiking backpack isn’t difficult, because most backpacks are designed to help you spread out the weight evenly. This prevents uneven weight distribution and helps you stay balanced during the hike.
Component-specific compartments give you a designated place for gear, help you stay organized and allow you to find what you need quickly. These compartments also help prevent uneven weight distribution. Additionally, a backpack with a reinforced frame helps provide stability and prevents the contents inside your pack from moving around.
When you’re learning how to pack for backpacking, some of the most important lessons include weight distribution and position, how to layer, and how to protect your gear.
Distribute Heaviest Items Along the Back Panel
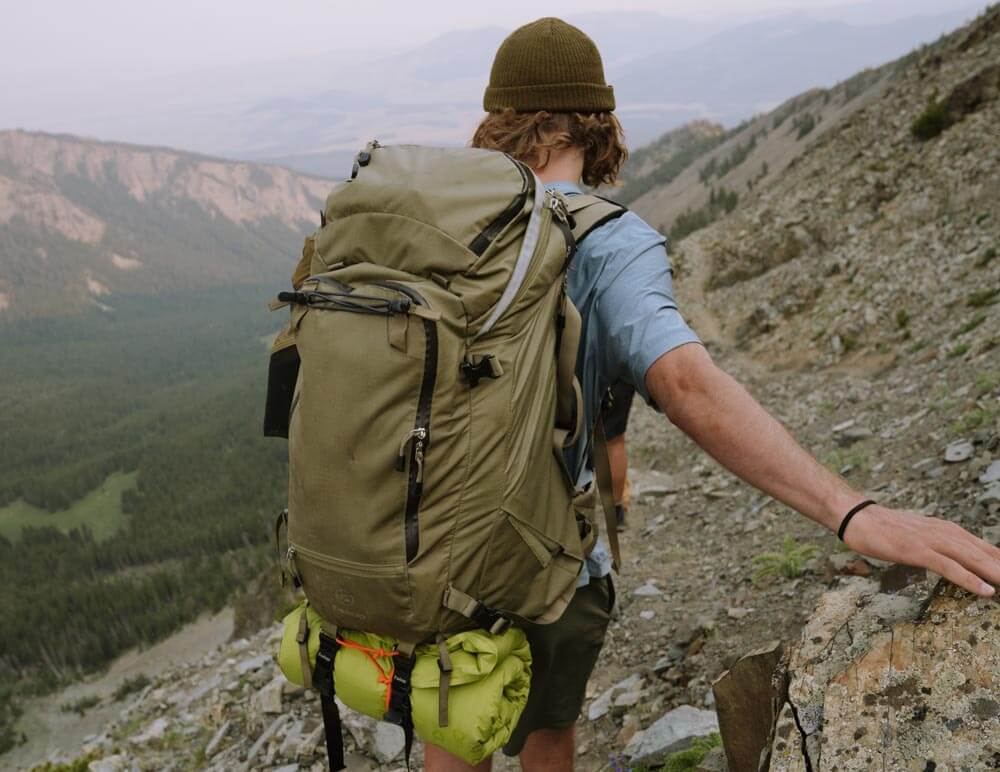
The back panel is one of the most important areas to focus on when learning how to pack a backpacking pack. The “back panel” refers to the reinforced broad side of the backpack that sits along your back.
Heavy items should be packed as close to your body as possible to prevent the pack from causing you to lean back. The goal is to evenly spread weight out along your back from around the top of the waist to the top of the shoulders to maximize distribution.
Position and Layer Items So They Don’t Move and Improve Stability

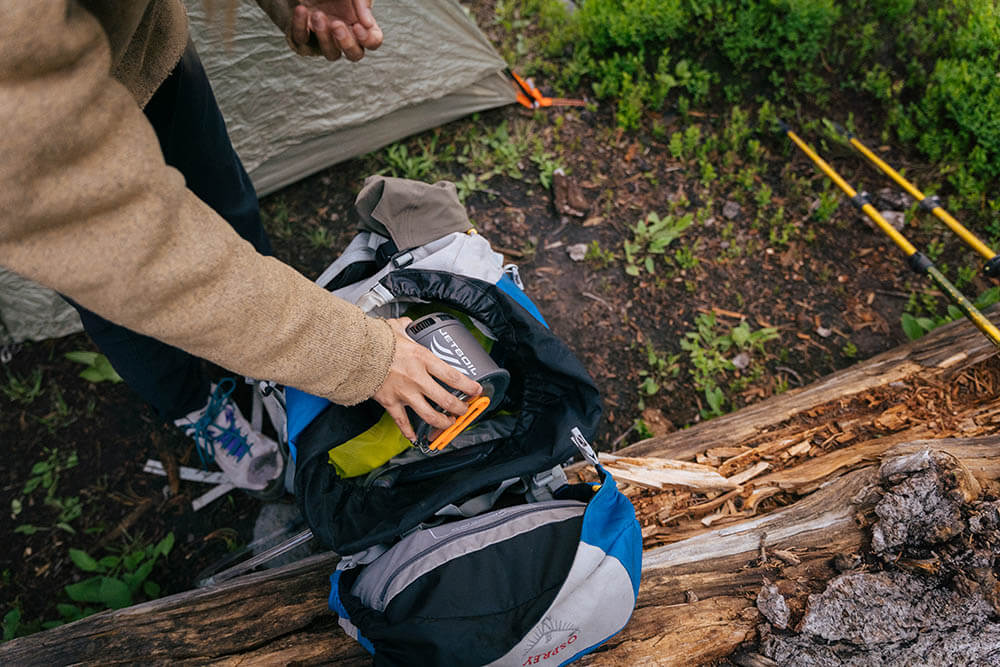
When figuring out how to pack a backpacking backpack, it’s important to use the natural shape of your gear to create a stable stack inside of your pack. In this video, a backpacking expert talks about how he removes the poles from his tent and uses it to protect his Jetboil stove.
By creating stability, you’re ensuring less movement inside the pack, which means more stability and - ultimately - safety. It can be dangerous on more treacherous hikes to lose your footing from a poorly packed backpack.
Protect Your Cooking Stove
One way to protect your cooking stove is to wrap it in other gear. For example, in this video, the expert wraps his Jetboil stove in his tent rain flap and netting.
You can protect other gear by wrapping it this way, including your water bladder and any food or personal items that can be damaged during the compression of your pack or during your hike.
Be Careful with Pointy or Sharp Objects in Your Pack
When learning how to pack a camping backpack, it's important to know how to protect thin waterproof materials like tents and sleeping bags.
Sharp items like cooking equipment, knives, tent stakes, etc. should be carefully packed in protective pockets. These components can damage delicate items and cause serious issues over the course of a three-day trip.
Gear You’ll Likely Include in Your Backpack for a Three-Day Camping Trip
The following list is designed for packing a backpack for camping on a typical three-day or weekend camping trip. The gear list we’re recommending is an example of what you’d typically bring.
You will typically need the following pieces of gear:
- Sleeping bag
- Sleeping pad
- Camping stove
- Tent
- Clothing
- Water (either canteen or a bladder)
- Toiletries & hygiene supplies
- Kitchen supplies
- Small gear repair kit
- Small first aid kit
- Food
- Head lamp
For a more detailed list, check out the Ultimate Backpacking Checklist.
Prepare Before You Pack
Before packing, it’s recommended that you lay out all your gear to get a visual check that you have all the necessary gear and that it is all in good condition.
How to Pack Your Backpack in the Right Order
The following items are listed from the first thing you’ll want to pack to the last thing packed. First, pack gear that goes into the main compartment. Then, pack things that fit into exterior pockets and attachments.
1. Sleeping Bag
Here is how to pack a sleeping bag in a backpack. Your sleeping bag is almost always packed at the bottom of your pack. Although sleeping bags are usually not that heavy, they definitely take up more space, or “volume.”
Most newer packs have a dedicated sleeping back pouch at the bottom of the pack; otherwise, you’ll just pack it at the very bottom of the pack.
2. Camping Stove & Fuel

Pack your camping stove and fuel centered on top of the sleeping bag. It’s not the heaviest component, but it’s an item that you should try to wrap in something soft.
3. Extra Reserve Water
You will pack water in two different vessels. First, there’s water you’ll have on hand, usually in a canteen or Nalgene packed on the exterior of your pack.
Next, you’ll need enough extra reserve water to last you the entire three-day trip. Most backpacking experts recommend using a bladder (similar to a Camelback) to easily transport up to a gallon of water while distributing the weight.
If you’re not using a bladder, the vessel should sit on top of the sleeping bag along the back panel. This should be packed as close to the center bottom of the back panel as possible.
You should also be prepared to purify water on the trail if there is a viable water source.
4. Cooking Supplies
You’ll need to pack cooking supplies, which may include pots and pans, camp utensils, cups, and dishes. What you bring will depend on how minimal or ultralight you plan to backpack.
These are harder items that can go along the sides of the pack.
Additionally, when you pack harder or more rigid components along the sides of the pack, you’re reinforcing it and adding more stability. This also helps to disperse the weight.
5. Tent & Tent Poles

A tent usually comes with fabric, a rainfly, and poles. Let’s assume you have a single or smaller two-person backpacking tent.
Here’s how to pack a tent in a backpack: if you can fit your tent into your bag, it fits best along the sides of your pack.
Pro tip: Pack your poles separately so your tent can be compressed in your pack, and your poles can be attached to the exterior of your pack by straps or another method.
6. First Aid and Utility Repair Kits
Your first aid and utility repair kits are part of your typical backpacking gear list. Since they are small and easy to pack, they work best to help reinforce the sides and help distribute weight
If you’re running out of room in the main compartment, these are items that can go on top for quick access or in a utility pocket or compartment on the exterior of the pack.
7. Toiletries
Similar to your utility and first aid kit, toiletries can be used to help add reinforcement to the pack and distribute weight a bit more evenly.
Toiletries typically don’t need to be easy to access mid-hike, so they can be buried under other items.
8. Food

Food is a highly subjective gear item, but most experts have a space-conscious method to pack enough food for a trip. You’re likely not going to see experts bringing cans of beans or other heavy items.
Food items are best packed on top of your camp stove along the center of the back panel, closer to the top so they’re easier to access.
Minimalists and ultralight backpackers love just add water meals because they are lightweight and take up little space. Back Country Cuisine, Local Dehy & Real Meals are a few of our team favourites.
9. Extra Clothing
How much clothing to pack is subjective. Most experts who know how to pack for a backpacking trip bring just the right amount of clothing to be prepared for all conditions according to the season, weather, and geography.
Clothing is best packed on the outside of the pack, behind the food. Ideally, clothing is also reasonably easy to access.
10. Accessories and Quick Access Items
The following are assorted items that you can easily attach to flap compartments, utility pockets, or straps on the exterior of your pack:
- Trail snacks
- Trail water
- Headlamp/flashlight
- Utility gloves
- Camping knife
Since these items are usually packed in a pocket, they should be packed before the exterior-attached larger items.
11. Large Exterior-attached Items
Exterior-attached items are typically lighter items that are only accessed when setting up or breaking down camp.
These items might include:
- Sleeping pad (if it couldn’t fit inside the bag)
- Tent Poles (if you separated it from the tent bag)
- Trekking poles
Find a Backpacking Packing System that Works for You
Today’s backpacks are typically built thoughtfully, with all the pockets and zippers you need to access necessities. A properly packed bag can allow you to carry more gear farther and more comfortably.
However, even the most high-tech bag needs to be packed correctly. Before you hit the trail, where you’ll be carrying your pack for hours or days, make sure your backpack is balanced and comfortable.
You may need to experiment to find the best way to pack your backpack based on your backpack design and what you typically bring on your adventure.